Doctor in the Making SVG Design: A Practical Guide to Using Layered SVG Files for Creative Projects
If you are building a creative business, preparing gifts for medical school graduates, or simply enjoy crafting with your Cricut, the Doctor in the Making SVG Design offers a versatile starting point. This digital download bundle provides word-by-layer SVG files and companion formats that let you create everything from custom apparel to wall art. Understanding what comes in the set, how the files work together, and where each format fits in your workflow will help you move faster and produce consistent results.
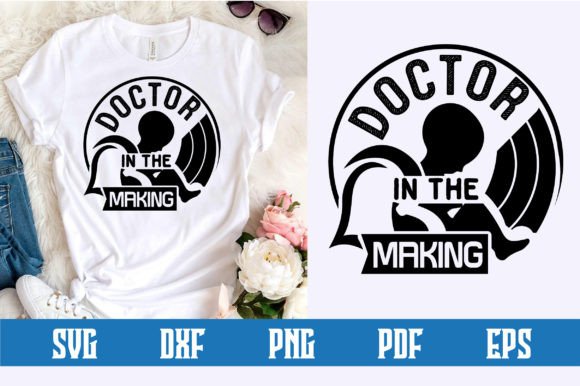
What Is the Doctor in the Making SVG Design Bundle?
This bundle is a collection of layered SVG files built around the theme of someone on the path to becoming a doctor. Each layer is separated by word or element, which gives you full control over colors, sizing, and placement. The bundle includes an SVG file designed for Cricut machines, along with EPS, PNG, DXF, and PDF versions of the same design. Because it is a digital download only, there is no physical product shipped. You receive a single .zip folder containing all five file types, ready to unzip and import into your preferred software or cutting machine.
The design itself works well for milestone events such as medical school acceptances, white coat ceremonies, study breaks, and graduation parties. But its real value lies in how the layered format allows you to adapt the same design across different materials and projects without starting from scratch each time.
How the File Formats Fit Into Your Workflow
Each file type in the bundle serves a specific purpose. Knowing which one to use at each stage of your project saves time and reduces errors.
SVG File for Cricut and Other Cutting Machines
The SVG file is the primary format for cutting machines. It preserves the word-by-layer structure, so each text element or graphic piece remains a separate, editable object. When you import the SVG into Cricut Design Space, you can assign different colors to each layer, resize the entire design without losing proportion, and arrange pieces on your cutting mat for maximum material usage. If you are producing multiple items with the same design, keeping the SVG as your master file lets you tweak colors or swap elements without redoing your layout.
EPS File for Vector Editing
The EPS file is a fully editable vector format. Use it in Adobe Illustrator, CorelDRAW, or Affinity Designer when you need to modify the design beyond simple color changes. For example, you might want to add a custom name, rotate individual words, or combine the design with other vector elements. Working in EPS means your edits remain resolution-independent, so scaling up for a large poster or down for a small card stays crisp.
PNG File with Transparent Background
The PNG file at 300 DPI with a transparent background is your go-to for digital mockups, print-on-demand listings, or quick previews. Because the background is transparent, you can place the design on any colored background in a presentation, social media post, or product listing without having to remove a white box. Use this format when you want to show a customer how the design will look on a navy blue mug or a pastel T-shirt before you cut or print anything.
DXF File for AutoCAD and Alternative Software
The DXF format is an interchange file commonly used in AutoCAD but also supported by several laser cutting and engraving programs. If you work with a laser cutter, vinyl cutter other than Cricut, or CAD-based design software, the DXF version gives you a clean vector outline that preserves the layered structure. This file type is especially useful when you need to transfer the design between different operating systems or software environments.
PDF File for Printing and Manual Adjustments
The PDF file works as a universal reference and print-ready format. Open it in any PDF viewer or Adobe Illustrator to check dimensions, print a proof copy, or trace the design manually if you prefer hand-cutting. The PDF also serves as a reliable backup when other file formats fail to import correctly due to software version differences.
Practical Implementation Tips
Getting consistent results with the Doctor in the Making SVG Design comes down to preparation and material choice. Here are a few practical approaches based on real project workflows.
Prepare Your Workspace and Software
Before unzipping the files, make sure your cutting machine software is up to date. For Cricut users, Design Space should be the latest version to avoid import errors. Unzip the folder to a dedicated project directory on your computer, not directly onto a USB drive or cloud sync folder. This prevents partial file transfers and keeps your source files organized for future reuse.
Test on Scrap Material First
Because the design includes multiple layers, the alignment between layers can shift slightly if your cutting mat is not level or your material is thicker than standard. Cut a test piece on scrap vinyl or cardstock before running your final material. This lets you verify layer registration and adjust pressure settings without wasting expensive HTV or specialty paper.
Use Consistent Color Palettes Across Projects
The word-by-layer structure makes it easy to reuse the same design for a series of items. If you are making shirts for a study group, a mug for the class president, and a sign for the welcome table, decide on a color palette ahead of time. Save the hex codes or CMYK values from your first project and apply them to subsequent ones. This keeps your entire set of items visually cohesive even if you produce them days or weeks apart.
Combine with Other Design Elements
The Doctor in the Making SVG works well as a stand-alone design, but it also pairs naturally with other medical-themed graphics. If you have a stethoscope icon, DNA helix, or caduceus symbol in your library, import them into the same SVG project and distribute the layers evenly. The key is to keep the original SVG as a base layer and build additional elements on top without merging or flattening the layers, so you retain editability for future projects.
Where This Design Fits Into a Broader Process
The Doctor in the Making SVG Design is not just a one-off cut file. It works as a reusable asset in a larger content or product creation cycle. Consider these scenarios:
- Pre-event preparation: Before a white coat ceremony, use the SVG to cut multiple shirts, tote bags, and coffee sleeves in one session. Batch-producing items with the same design saves setup time and ensures consistency across gift bags or event merchandise.
- Post-event thank-you items: After a medical school graduation, use the PNG file to create thank-you cards with the design printed on high-quality cardstock. The transparent background lets you place the design anywhere on the card layout without clipping.
- Ongoing study group branding: If you run a study group or tutoring service for pre-med students, the design can become a recurring motif on worksheets, folder covers, and social media graphics. Keep the EPS file as your editable master so you can update dates, names, or taglines each semester.
In each case, the design interacts with other tools you already use, such as your cutting machine software, a vector editor, and your print setup. The key is to understand which file format to pull from at each step rather than treating all five files as interchangeable.
Compatibility and Long-Term Usability
The formats in this bundle are widely supported across both hobbyist and professional tools. SVG and DXF files work with Cricut Design Space, Silhouette Studio, Brother ScanNCut, and many laser engravers. EPS and PDF files open in Adobe Illustrator, Affinity Designer, Inkscape, and CorelDRAW. PNG files are universal for digital use.
For long-term storage, keep the SVG and EPS files in a folder labeled with the design name and date. Avoid renaming individual layer files inside the SVG unless you document the changes. If you update the design in the future, always save a new version with a version number so you can revert if needed.
Quality Control and Final Checks
Before you ship a finished item or publish a listing, run through a quick quality check:
- Open the SVG in your cutting software and verify that all layers are visible and correctly named.
- Check the size against your intended material. The SVG imports at its original dimensions, so scale up or down as needed, but avoid scaling below 50% of the original size to maintain cut precision.
- For print-on-demand or sublimation projects, use the PNG at 300 DPI and check that no compression artifacts appear around the edges of the text.
- If you used the DXF for laser cutting, confirm that the line thickness is set to a hairline or 0.001 inch to avoid double cutting on the same path.
This review takes less than five minutes and prevents wasted material and frustration during production.
Final Observations on Using Layered SVG Designs
The Doctor in the Making SVG Design bundle gives you more than a single graphic. It provides a flexible asset that adapts to different tools, materials, and output methods. By understanding the role of each file format, testing on scrap before committing to final material, and keeping your source files organized, you can integrate this design smoothly into your regular creative workflow. Whether you are producing one custom gift or a small batch of merchandise, the layered word-by-layer structure puts you in control of color, scale, and application. Use it as a foundation, then build around it with confidence.