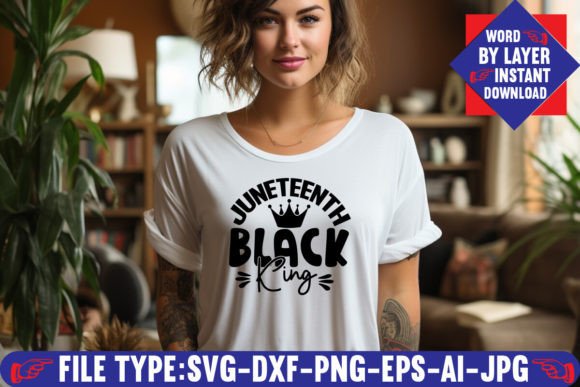
Juneteenth Black King Svg Design: A Practical Guide for Creators and Entrepreneurs
When planning a project that celebrates culture, identity, and history, few elements are as immediately versatile as a well-crafted vector design. The Juneteenth Black King Svg Design is one such asset—a digital file that combines the symbolic weight of Juneteenth with the empowering imagery of Black royalty. Whether you run a small print shop, create content for social media, or craft handmade gifts for community events, this design can serve as a core visual building block.
Because it comes as a layered SVG and a suite of companion formats, the design is ready to move into your production pipeline without additional redrawing. You can begin with a single download and end with a finished product—a T-shirt, a banner, a decal, a greeting card—in moments. The key is understanding how each file type works within your existing tools and how to integrate the design into your workflow from planning through execution.
Understanding the Juneteenth Black King SVG Design
This design typically features bold typography, silhouette imagery, or symbolic motifs that honor the Juneteenth holiday and celebrate Black excellence. The vector format means every curve and line is mathematically defined, so you can scale the artwork from a small sticker up to a large display banner without losing quality. The “Black King” theme reinforces dignity and empowerment, making the design especially suitable for events, church gatherings, educational materials, or personal accessories.
Because it is delivered as a digital download only, there is no inventory to manage, no shipping delays, and no physical product to store. You gain immediate access to the files, and you control when and how you produce the final item. This fits naturally into a just-in-time production model—you can create one shirt for a client or a hundred for a festival, all from the same set of files.
Where This Design Fits in Your Creative Workflow
The Juneteenth Black King Svg Design can enter your process at multiple points:
- Before a project: Use it as a planning asset. Open the SVG in your design software to mock up colors, placement, and sizing on different product templates. Because the layers are separate, you can hide elements to test variations.
- During production: Import the file directly into cutting machine software (Cricut Design Space, Silhouette Studio) or print-on-demand platforms. The layered SVG structure makes it easy to assign different materials or colors to each layer.
- After a project: Keep the PNG with transparent background for digital use—watermarks, social media posts, or email headers. The vector sources remain editable for future adaptations.
This flexibility means you are not locked into a single use case. The same file that decorates a poster for a local Juneteenth celebration can later become a laser-engraved wooden sign or an embroidered patch.
What’s Inside the Download: File Breakdown
Every purchase of this design includes one .zip archive containing six file formats. Understanding each format helps you choose the right one for your specific tool and output:
- 1 AI File (Adobe Illustrator Source): Fully editable vector with layers. Use this if you need to adjust colors, add text, or merge with other Illustrator artwork. Ideal for professional print designers.
- 1 SVG File (Word By Layer SVG Cut File): The primary file for cutting machines. It preserves layer names and grouping, making it straightforward to assign materials in Cricut Design Space or Silhouette Studio.
- 1 PNG File (300 DPI, Transparent Background): Ready-to-use raster image for web mockups, print-on-demand platforms, or quick digital previews. No transparency issues.
- 1 EPS File (Editable Vector): Compatible with older vector software and some professional engraving tools. Retains scalability and editability.
- 1 DXF File: Often used in CAD-like environments and certain laser cutters. Useful if your workflow involves engineering or architectural software.
- 1 JPEG File: Universal format for reference, thumbnails, or quick previews. Lower file size but not suitable for cut files.
Having all six means you can move between software platforms—from Adobe Photoshop to Inkscape to a brother ScanNCut—without needing to convert or re-download.
Preparing Your Workspace and Tools
Before you cut or print, take a few minutes to organize your digital workspace. Unzip the .zip file and create a dedicated folder with a clear name (e.g., “Juneteenth Black King SVG 2025”). Inside, place each file type in its own subfolder if you work with multiple machines or share assets with a team.
Compatibility notes:
- Cricut users: Upload the SVG directly into Design Space. Use the “Upload > Upload Image > Complex” option. Because layers are named, you can easily change colors or hide layers. Ensure your canvas size matches your material.
- Silhouette users: Import the SVG into Silhouette Studio. The layers should appear as separate objects. Check that the design is not grouped in a way that prevents you from moving individual elements.
- Adobe users: Open the AI file for full layer control. Use the EPS in Illustrator or CorelDRAW. The PNG can be placed directly in Photoshop for mockups.
- Inkscape users: Open the SVG or EPS. Inkscape handles both well, though some effects may require flattening if they are Adobe-specific.
If you encounter any scaling issues, always reference the original SVG dimensions before resizing. The DPI of the PNG is 300, which means it prints sharply up to about A4 size. For larger prints, rely on the vector files.
Practical Implementation Tips
Working with layered SVG files requires a mindset of material assignment rather than color fill. Each layer in the design corresponds to a physical piece of vinyl, paper, or fabric. Here are a few tips to keep your cuts clean and your assembly efficient:
- Test with scrap material first. Before cutting the final piece, run a small test to confirm that the blade pressure, speed, and material type are correct. This is especially important for intricate designs with thin lines.
- Use mirrored mode for HTV (heat transfer vinyl). When creating iron-on designs, remember to mirror the entire design so that the final orientation is correct on the shirt.
- Offset for weeding. If the design has tiny cutouts, add a small offset (e.g., 0.01 inch) to make weeding easier. This is common for text or crowns with narrow spaces.
- Combine layers into a single color group if you want a monochrome look. Many cutting machine interfaces allow you to weld layers together. This can simplify weeding for large production runs.
T-shirt Design for Juneteenth Events
You plan to sell shirts at a local community celebration. Open the SVG in Cricut Design Space, assign each layer to a different color of HTV. For a three-color design, you will cut each layer separately on the appropriate vinyl sheets. After weeding, use a heat press at 305°F for 10 seconds (adjust for your material). The PNG file can serve as a mockup to show customers previews before they buy.
Banner or Poster
For an educational display, open the AI file in Adobe Illustrator. Scale the design to 24 x 36 inches. The vector resolution handles this without pixelation. Add event text and a subtle background shape. Export as a high-resolution PDF for your local print shop. The EPS file works as a fallback if the printer uses older RIP software.
Decals for Water Bottles or Laptops
Use the SVG in Silhouette Studio with adhesive vinyl. Because the design is layered, you can cut each color separately and layer them on a transfer tape. Small decals benefit from the PNG as a visual reference when aligning layers. For permanent vinyl, ensure the surface is clean and dry before application.
Organizing Your SVG Library for Long-Term Use
If you collect multiple digital designs, a systematic filing system saves time later. Name your folder with the year and theme: “2025_Juneteenth_BlackKing.” Inside, keep the original zip and also maintain an “Editable” folder with the AI and EPS files, and a “Use” folder with the SVG and PNG. When you revisit the design next year, you will not have to search through dozens of unlabeled files.
Consider adding tags in your file metadata (where supported) such as “Juneteenth,” “Black King,” “SVG,” “layered,” “cut file.” This makes searches faster in Finder or Windows Explorer.
Ensuring Quality and Consistency Across Projects
Because the design is digital, quality control depends on your output process. Always check the following before producing multiple copies:
- Path integrity: Open the SVG in a viewer and zoom in to ensure no stray nodes or broken curves exist. A well-made design should be clean, but it never hurts to verify.
- Layer order: In the SVG, layers should be organized logically (e.g., background first, then middle elements, then top details). If you notice misordering, adjust in your vector software before cutting.
- Color depth: The PNG uses RGB. If you are printing CMYK, convert using your software’s color management. For cutting machines, colors are arbitrary—they only represent different cut actions.
- Backup files: Store a copy of the zip on cloud storage or an external drive. A digital-only product means you are responsible for the original files. Losing the download link should not mean losing the design.
Integrating This Design with Other Resources
The Juneteenth Black King Svg Design works well alongside other SVG elements such as borders, backgrounds, or additional text. You can combine it with a distressed flag texture for a vintage look, or pair it with laurel wreath vectors for a regal frame. Because it comes as an AI file, merging with other Illustrator libraries is straightforward.
If you use a design subscription service (like Creative Fabrica or Design Bundles), check that your license allows derivative works. This particular design is typically covered under standard commercial use for up to a certain number of sales—always review the seller’s terms. For personal projects, you have full freedom.
Final Considerations for Digital Only Products
Remember that you are purchasing a license to use the files, not a physical item. This gives you the ability to reproduce the design many times, but also places the onus on you to manage the files responsibly. Keep organized folders, note the software version compatibility, and test each format before a deadline. The flexibility of having AI, SVG, PNG, EPS, DXF, and JPEG means there is almost no tool or machine where this design cannot be used.
Whether you are a small business owner preparing for a busy Juneteenth season, a teacher creating classroom materials, or a hobbyist learning a new cutting machine, the Juneteenth Black King Svg Design offers a reliable, scalable, and meaningful asset that fits seamlessly into your existing workflow. Plan ahead, test early, and let the layers guide your creative process.