Sister in the Making Svg Design: What to Know Before You Buy or Craft
If you have ever searched for a meaningful way to celebrate a new baby girl, a growing sibling bond, or a family milestone, you have likely come across the Sister in the Making Svg Design. It is one of those versatile digital files that crafters and small business owners love because it turns a simple phrase into a heartfelt project. But as popular as these designs are, there is plenty that can go wrong if you do not understand what you are actually buying, how to use it, or what to watch for before you hit download.
I have worked with SVG files for years, and I have seen the same mistakes surface again and again. Some are small annoyances. Others cost time, money, or a finished product that just does not look right. This article walks through the most common pitfalls people encounter with Sister in the Making SVG files, from choosing the wrong format to overlooking compatibility issues, and shares practical ways to avoid them.
What the Sister in the Making SVG Design Actually Includes
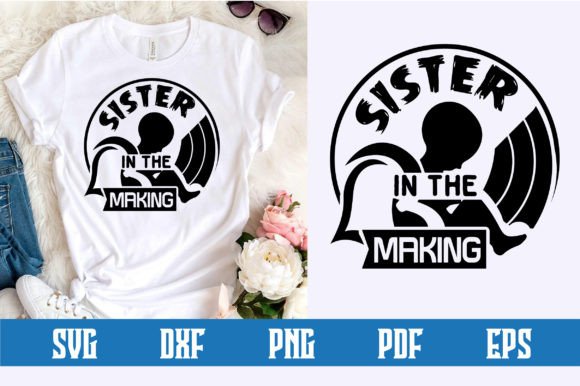
Before you start cutting or printing, it helps to know exactly what is inside the digital package. A typical download for this design is a .zip file containing several file formats, each serving a different purpose. The files you should expect include:
- 1 SVG File: The primary format for Cricut and most cutting machines. This is the "word by layer" version, meaning each word or element can be a separate color or material layer.
- 1 EPS File: A vector file that is fully editable, useful if you want to tweak the design before cutting.
- 1 PNG File: 300 DPI with a transparent background, ideal for print-on-demand mockups or digital previews.
- 1 DXF File: Often used with Silhouette or AutoCAD-compatible software.
- 1 PDF File: An Adobe Illustrator source file, handy if you need to open it in vector editing software.
None of this includes a physical product. It is a digital download only. That might seem obvious, but I have seen beginners order thinking they are getting a shirt or a sign. Always read the listing carefully.
Common Mistake #1: Assuming All SVG Files Work the Same Way
One of the biggest misunderstandings is that an SVG is an SVG, and any machine can read it. That is not true. The Sister in the Making Svg Design is described as "word by layer," which means each line of text or decorative element is on its own layer. This is fantastic for multi-color projects. But if your software or machine does not support layer separation, you may end up with a single merged shape that cannot be split.
When that happens, you cannot assign different colors to different words. The design becomes a single color cut or print, which defeats the purpose of a layered design.
How to avoid this mistake
Check what software you are using before you buy. Cricut Design Space, Silhouette Studio (Business Edition), and Adobe Illustrator handle layered SVGs well. Free or basic versions of some software may flatten the layers. If you are new, search for a tutorial on "how to ungroup layers in SVG" using your specific program. It takes two minutes and can save you a headache.
Common Mistake #2: Overlooking the "Word by Layer" Structure
The phrase "word by layer" is not just marketing. It means the design is built so that each word or phrase in Sister in the Making sits on its own separate layer. You can make "Sister" pink, "in the" white, and "Making" gold, all without recreating the file.
But here is where people slip. They upload the file, see one layer, and assume it is broken. Or they see multiple layers and do not know how to manage them. Then they either give up or they end up cutting the design as a single color, losing the charm that made them want it in the first place.
Better approach
After you unzip the download, open the SVG file in your cutting software. Look for the Layers panel. If you see listed items like "Sister," "in the," and "Making," you are good to go. If they appear merged, try importing the EPS or AI file instead. Sometimes, the SVG format works slightly differently depending on how the designer exported it.
Common Mistake #3: Ignoring File Format Compatibility with Your Machine
Not every file format works on every machine. Cricut users generally want the SVG. Silhouette users often prefer the DXF or SVG, but older versions of Silhouette Studio may not support SVG well. And if you are using a laser cutter or a professional vinyl plotter, you might need the EPS.
I have watched crafters buy a beautiful Sister in the Making Svg Design only to realize their machine requires a different format. Then they search frantically for a converter or ask the seller for a different file type. Some sellers are gracious and offer support. But not all do.
What to check before buying
- Know your machine model and the file formats it accepts natively.
- Look at the product listing to confirm the files included match your needs.
- If the listing only mentions SVG and you need DXF or EPS, ask the seller before purchasing.
Common Mistake #4: Not Checking the Design Size Before Cutting
This one is surprisingly common. You download the file, load your mat, and cut. Then you realize the design is either tiny or way too big for your project. The Sister in the Making Svg Design may come at a default size that varies by seller. Some set it at 8 inches wide. Others set it at 4 inches.
If you are making a shirt, you want the design to be roughly 10 to 12 inches wide. If you are making a mug, you need something around 4 to 5 inches. If you cut without resizing, you either waste vinyl or end up with a design that looks awkwardly placed.
Simple fix
Always check the dimensions of the design in your software before you cut. Most programs show the width and height. Resize proportionally by holding the shift key while dragging a corner handle. If your design has multiple layers, group them first, then resize the entire group to keep everything aligned.
Common Mistake #5: Forgetting That Digital Files Need Proper Unzipping
This sounds too basic to mention, but I have seen it trip up plenty of people. The download arrives as a .zip file. Some users try to open it directly in their cutting software without extracting it first. The software cannot read a compressed folder, so nothing shows up. Or they extract it but forget where the files were saved.
A few minutes later, frustration sets in. They think the file is corrupted or the seller sent an empty download.
Quick tip
On a Windows computer, right-click the .zip file and choose "Extract All." On a Mac, double-click it to unzip. Then move the extracted folder to a location you will remember, like your desktop or a dedicated "SVG Designs" folder. Then import the file from that location into your software.
Common Mistake #6: Using the Wrong Resolution for Print Projects
If you are using the design for a physical cut, resolution does not matter much because the machine reads the vector paths. But if you want to print the design on a shirt, sign, or card, you need the PNG file at 300 DPI. That high resolution ensures the text and graphics look crisp, not pixelated.
The Sister in the Making Svg Design bundle includes a 300 DPI PNG with a transparent background, which is ideal for print-on-demand services like Printful, Redbubble, or your own inkjet printer. Yet many people grab the SVG for a print project, then wonder why the edges are rough or the text is blurry.
Better practice
Use the SVG for cutting vinyl or other materials. Use the PNG for any printing project. If you need to edit the design before printing, open the EPS or PDF in a vector program, make your changes, then export as a high-resolution PNG.
Common Mistake #7: Assuming One Design Fits Every Project Type
The Sister in the Making Svg Design works beautifully on shirts, mugs, signs, cards, home decor, clothing, stationery, and wall art. That is true. But not every project needs the same version of the design.
For a shirt, you might want the design mirrored if you are using heat transfer vinyl. For a sign, you might want the layers separated to use different paint colors. For a mug, the design might need to be smaller and adjusted for a curved surface. People often try to use the exact same file for everything without adjusting for the medium.
What to do instead
Think about your project before you open the file. If you need a mirror image for heat transfer, most software has a flip or mirror tool. If you need smaller sizes, scale it down. If you want to rearrange the words to fit a different shape, use the vector files (EPS or SVG) so you can move elements freely.
Common Mistake #8: Not Reading the Seller's Usage Terms
This is easy to overlook. Many SVG sellers allow personal and small commercial use. Some restrict the number of products you can sell. Others forbid using the design on print-on-demand sites without an extended license. If you are a small business owner or entrepreneur planning to sell finished products with the Sister in the Making Svg Design, you need to know what the seller allows.
I have seen crafters get their accounts flagged on marketplaces like Etsy because they used a design without the proper license. It is not worth the risk.
Simple rule
Read the listing description thoroughly. If it says "commercial use allowed," save a screenshot or copy of that information. If you are unsure, message the seller before you sell anything. Most sellers are happy to clarify.
Common Mistake #9: Skipping a Test Cut
You have your design loaded, your vinyl on the mat, and you are ready to go. But you skip the test cut. Then the blade pressure is wrong, the material shifts, or the design cuts through the backing paper. A beautiful layered SVG file is useless if the cut fails.
This is especially true for word-by-layer designs. If the first layer cuts incorrectly, each subsequent layer may not align properly.
How to do it right
Always run a small test cut with a scrap piece of the same material. Check that the blade depth, pressure, and speed settings are correct. Once the test cut looks clean, proceed with your actual material. It takes an extra 60 seconds and saves you from wasting a full sheet of vinyl.
What to Look for in a Quality Sister in the Making SVG File
Not all SVG files are created equal. Before you buy, check a few things:
- Clean vector paths: The design should have smooth curves, not jagged edges when zoomed in.
- Properly named layers: Good sellers label layers so you know which word is which.
- No missing fonts: Word-by-layer designs should have text converted to paths, so you do not need to install any fonts.
- Positive reviews: Look for feedback about file quality and customer support.
A well-made SVG file saves you time and reduces frustration. A sloppy one can ruin your project and your motivation.
Final Thoughts on Using the Sister in the Making SVG Design
The Sister in the Making Svg Design is a lovely, flexible digital product that can help you create heartfelt gifts, home decor, or sellable items. But like any digital file, it works best when you understand what you are getting and how to use it correctly. Check your file formats, know your software, resize before cutting, and always test first. Small habits like these turn a good design into a great finished product.
Whether you are a beginner making a onesie for a friend's baby shower or a small business owner building a product line, taking the time to avoid these common mistakes means you will spend less time troubleshooting and more time creating. And that is the whole point.