Understanding Camper PNG, Camper Clipart, and Sublimation Designs
When you explore digital resources for camper-themed projects, you quickly encounter terms like Camper PNG, Camper Clipart, and sublimation. These formats serve overlapping yet distinct purposes, and understanding their differences helps you choose the right resource for your specific project. Whether you are designing t-shirts, creating decals, building scrapbook pages, or preparing marketing materials, the file format and quality specifications directly impact your final result.
This article examines what Camper PNG files offer compared to traditional clipart and other formats, discusses the role of sublimation printing, and walks through the practical considerations that influence your choice. The focus is on helping you evaluate options based on your workflow, output medium, and design needs.
What Makes Camper PNG Distinct from Standard Clipart
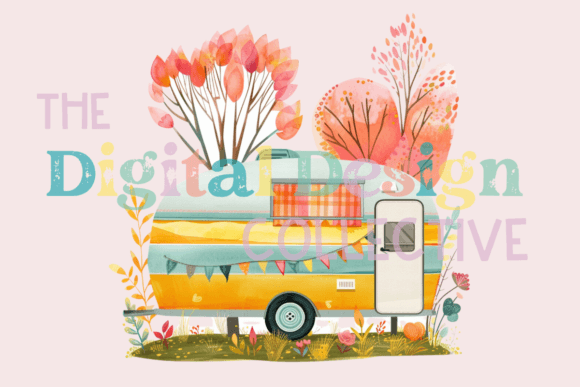
Traditional clipart often comes as low-resolution raster images, vector files, or embedded graphics in office software. While clipart collections are convenient for quick use, they rarely meet the demands of professional printing or detailed customization. Camper PNG files, particularly those offered at 300 dpi with dimensions of 3000 by 3000 pixels, fill a different role. They combine a transparent background with high resolution, giving you a ready-to-use image that layers cleanly onto any backdrop without visible edges or white boxes.
The transparent background is especially important for campers, which feature irregular outlines around wheels, awnings, hitches, and rooflines. A PNG file preserves these details so you can place the camper image over a photograph of a campsite, a patterned background, or a solid color without extra cleanup work. The 300 dpi resolution ensures that the image remains sharp when printed on large surfaces, such as poster boards, banners, or fabric items. At 3000 pixels per side, you also have room to scale the image down without losing clarity, which is useful for smaller items like stickers or labels.
Clipart, by contrast, often ships at 72 or 150 dpi, which is adequate for on-screen display but produces visible pixelation when printed at larger sizes. Many clipart sets also lack a true transparent background, leaving you to manually remove white areas or work around embedded backgrounds that clash with your design.
Resolution and Scalability Tradeoffs
Resolution is one of the most practical factors when comparing Camper PNG with clipart. A 300 dpi image at 3000 by 3000 pixels gives you approximately 10 inches of print width at full quality. If you need a larger print, you can upscale moderately without severe degradation, though you may eventually reach the limits of a raster file. Vector clipart, such as SVG or EPS formats, offers unlimited scaling because it relies on mathematical curves instead of pixels. However, vector files often require specialized software to edit, and finding well-designed camper vectors with the same level of detail as a high-quality PNG can be challenging.
For most home crafters and small business owners, the convenience of a ready-to-print PNG outweighs the theoretical advantage of vector scaling. If you frequently print at sizes larger than 12 inches on a side, or if you need to extract individual elements for different uses, a vector format might be more appropriate. But for the typical sublimation project, sticker sheet, or one-off decal, the 3000 by 3000 pixel PNG provides ample quality and ease of use.
Sublimation and Camper PNG: A Natural Fit
Sublimation printing relies on transferring dye into polymer-coated surfaces using heat and pressure. The process demands high-contrast, high-resolution images with clean edges because any blurriness or low detail becomes permanent on the final product. Camper PNG files, with their 300 dpi resolution and transparent background, align well with sublimation requirements. The transparent background ensures that only the camper image transfers, not a white box or halo. This is crucial for items like tumblers, mouse pads, polyester shirts, and ceramic coasters, where the substrate color shows through around the design.
One of the limitations of sublimation is that it works best on white or light-colored surfaces. Dark substrates absorb the dye poorly or require a white base layer. A Camper PNG with a transparent background simplifies this workflow because you can place the design on a white background within your editing software, then print it onto sublimation paper. You do not need to cut around the camper shape manually. The file gives you a crisp outline that matches the camper contours exactly.
Comparing Sublimation with Other Transfer Methods
When you use Camper PNG for sublimation, you get the advantage of a full-color, continuous-tone image without raised edges or texture. Heat transfer vinyl, another popular method, requires you to cut each color layer separately and weed out excess material. For a detailed camper with windows, stripes, and wheels, this process becomes time-consuming and error-prone. A PNG file used in sublimation preserves gradients, shadows, and fine details that would be difficult to replicate with vinyl layers.
Direct-to-film transfers and printable heat transfer paper also work with PNG files, but the resolution requirements differ. For sublimation, the 300 dpi standard is ideal because the transfer process holds fine detail well. For printable vinyl, you can sometimes work with slightly lower resolutions, but the 3000 by 3000 pixel size gives you flexibility to print at various dimensions without recalculating pixel density.
When Camper PNG Is the Right Choice
Camper PNG files shine in projects where you need a single, complete image ready for placement. If you are designing a tote bag with a retro camper scene, a mug featuring a vintage trailer, or a decal for a car window, the PNG format saves time. You open the file, import it into your design software, resize if needed, and send it to your printer or cutting machine. There is no need to trace, convert, or clean up the image.
This format also works well for digital scrapbooking, where you layer multiple elements on a page. The transparent background lets you stack a camper PNG over a woodland background, add text, and include other embellishments without worrying about clipping masks or background removal. The high resolution ensures that when you print the scrapbook page, the camper appears crisp against the background.
Limitations to Keep in Mind
Despite its advantages, a single Camper PNG file has constraints. Because it is a single image, you cannot easily separate the wheels from the body or change the color of the awning without editing the pixels. If you need to modify individual elements, you either work with the image as a whole or rely on photo editing software to select and recolor parts. Some users prefer layered files, such as PSD or SVG, that allow component-level editing.
Another consideration is file size. A 3000 by 3000 pixel PNG at 300 dpi can be several megabytes, which is fine for most modern computers but may be slow to upload or open on older devices. If you work exclusively with vector software, you might also find that raster PNG files do not integrate as smoothly with your usual workflow. However, for the majority of crafters, print-on-demand sellers, and small business owners, the tradeoff in file size is negligible compared to the time saved.
When You May Need a Different Option
There are scenarios where a Camper PNG is not the best fit. If you plan to produce a large outdoor banner, say 24 by 36 inches, the 3000 pixel width translates to about 10 inches at 300 dpi. To reach the banner size, you would need to upscale the image, which could soften details. In this case, a vector file or a larger resolution raster image would be more appropriate. Some designers prefer starting with a vector base, then exporting a high-resolution PNG at the exact size needed for printing.
Similarly, if you need to create multiple versions of a camper design with different colors for different products, you might benefit from a layered source file. For example, offering a red camper, a blue camper, and a green camper from the same base design is easier with a vector or a layered PSD than with a single merged PNG. You can recolor vector shapes instantly, whereas a PNG requires manual selection and painting.
For users who do not own photo editing software, working with PNG files can be limiting. Programs like Canva, Cricut Design Space, or Silhouette Studio handle PNG imports well, but advanced edits like changing the color of the camper body or removing the background gradient require tools that allow pixel-level manipulation. If you prefer no-editing workflows, a PNG that exactly matches your intended use is ideal. If you frequently customize, you may want to explore files that offer more flexibility.
Practical Examples and Use Cases
Consider a small business owner who sells custom campfire mugs. They use a Camper PNG at 300 dpi to create sublimation transfers. They import the PNG into their design software, add text like "Let's Go Camping," print it onto sublimation paper, and press it onto a mug. The transparent background ensures no white edge appears around the camper. The 3000 pixel width allows them to scale the image to fit the mug without losing sharpness. This workflow is repeatable and consistent across different mug sizes.
A scrapbooker working on a camping memory album uses the same PNG file. They place it over a textured background image of pine trees. The transparent background lets the camper blend naturally. They resize the image to fit a 6 by 6 inch page, and the 300 dpi keeps the details of the camper's windows and stripes intact. The scrapbooker does not need to cut around the camper or erase any background.
An Etsy seller creating sticker sheets uses the Camper PNG as one element among several. They arrange multiple camper variations on a single sheet, print on vinyl, and cut with a plotter. The high resolution ensures that even small stickers, scaled down to 1 inch, retain sharp edges and readable details. The transparent background means no white box appears around the camper on the final sticker.
Comparing File Attributes for Decision Making
- Resolution: 300 dpi at 3000 by 3000 pixels provides professional print quality for most home and small business projects. Lower resolutions are adequate for digital use only.
- Transparency: A transparent background is essential for layering over colored backgrounds, photos, or patterns. White-backed images require extra work to cut out or mask.
- File size: Larger files offer more detail but take longer to upload and process. Evaluate the balance between quality and your hardware capabilities.
- Editability: A single merged PNG offers limited editability. Choose this format when your design is final or requires only scaling and rotation.
- Scalability: Raster images have a maximum useful print size. Vector files scale infinitely but require different software and skills.
Making an Informed Choice
The decision between Camper PNG, clipart, vector files, or other formats depends on your specific output, your editing skills, and how much time you want to spend on preparation. For quick, high-quality results with a transparent background and professional resolution, a 300 dpi PNG file at 3000 by 3000 pixels covers most common crafting and small business needs. It removes the frustration of background cleanup and delivers consistent sharpness across a range of print sizes.
If your work involves heavy customization, multiple color variations, or very large prints, explore vector alternatives or layered raster files. But for the majority of projects involving camper imagery—mugs, shirts, decals, stickers, scrapbooks, signs, and gifts—the Camper PNG you get is a reliable, time-saving resource. By matching the file attributes to your workflow, you avoid unnecessary steps and produce results that look clean and professional.
Understanding what a 300 dpi transparent background PNG offers versus other options helps you spend less time troubleshooting files and more time creating finished products. Evaluate your typical project size, your preferred printing method, and your comfort with editing software. Those factors will guide you to the format that best supports your creative or business goals.