Y2k, Don’t Worry Be Happy: What to Know Before You Buy and Use Retro Smiley Sublimation Files
The phrase “Don’t Worry, Be Happy” has a way of sticking with you. Pair it with a retro smiley face and the bold, playful energy of Y2k design, and you have a visual that feels both nostalgic and fresh. Whether you are a small business owner creating custom apparel, a hobbyist exploring sublimation, or a freelancer looking for on-trend graphics, this combination is popular for good reason. But there is more to downloading and using a sublimation file than picking something that looks good in a preview. Understanding what you are actually getting, how to handle the file formats, and how to avoid common mistakes can save you time, money, and frustration.
Why This Design Works for So Many Creators
The Y2k aesthetic draws from the late 1990s and early 2000s: bold gradients, playful typography, and optimistic imagery. The smiley face, originally a symbol of simple happiness, fits right in. When you combine it with a message like “Don’t Worry, Be Happy,” you get something that resonates across age groups and project types. T-shirts, mugs, tote bags, posters, stickers, and phone cases all benefit from this upbeat, retro look.
Because the design is straightforward and the colors pop, it works for beginners who are still learning their press or printer settings, and it also satisfies experienced creators who want a reliable, sellable graphic. However, the success of your final product depends on how well you handle the files you download.
What You Actually Get in the Download
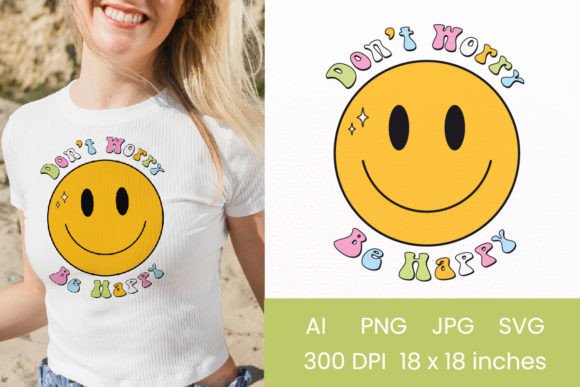
A quality sublimation file set should give you options. In this case, when you download the Y2k Don’t Worry Be Happy design, you receive four file formats, each at 18 x 18 inches with a high resolution of 300 dpi:
- AI (Adobe Illustrator) – vector format, fully editable
- SVG (Scalable Vector Graphic) – vector format, widely compatible
- JPG – raster image with a solid background
- PNG – raster image with a transparent background
This combination covers almost every use case. You can scale the vector files without losing quality, and the PNG is ideal for layering onto different backgrounds. The JPG works well for quick proofs or social media mockups. But having all these formats means nothing if you use them the wrong way.
Common Mistake #1: Using the Wrong File Format for Your Workflow
One of the most frequent errors people make is grabbing the first file they see and running with it, regardless of their software or equipment. For example, if you open the AI file in a program that does not fully support vectors, you may see missing fonts or broken layers. If you use the JPG for a sublimation transfer that requires a transparent background, you end up with a white box around your design.
This mistake leads to wasted time, wasted materials, and a final product that looks unprofessional. Instead, take a moment to match the file to your project. If you are cutting a design for a heat press and need only the artwork, use the PNG with transparency. If you want to resize or recolor elements, use the AI or SVG file in vector editing software like Illustrator, Inkscape, or Cricut Design Space. If you are printing a one-off proof, the JPG is fine.
How to Avoid This
Before you start, understand what your software and printer require. Most sublimation workflows benefit from a PNG because of the transparency, but if you plan to edit the design extensively, vector formats give you more control. Keep all four files organized in a folder so you never have to guess.
Common Mistake #2: Ignoring Resolution and Size Limits
You see “high resolution 300 dpi” and think it guarantees a perfect print every time. But resolution only matters if you use the file correctly. If you take the 18 x 18 inch PNG and try to print it at 24 x 24 inches, the quality will drop. The pixels stretch, and your crisp smiley face becomes blurry or pixelated.
People often make this mistake when they are in a hurry or assume that a high-res file can be enlarged indefinitely. Vector files (AI and SVG) can scale larger without quality loss, but raster files (JPG and PNG) have limits. Always check your print dimensions before sending the file to your sublimation printer.
Better Approach
If your project exceeds 18 inches on either side, use the AI or SVG file. Scale the vector design within your software, then export a new PNG at the correct size and 300 dpi. This preserves the sharp edges and smooth colors that make retro smiley designs look polished.
Common Mistake #3: Overlooking Transparency Needs
The PNG file comes with a transparent background. That is a major advantage when you are applying the design to colored shirts, bags, or other surfaces. But some users accidentally use the JPG instead, not realizing it has a solid white background. Others try to remove the white background themselves and end up with rough edges or leftover halos.
Transparency is especially important for designs like the Y2k smiley, where the yellow face and text should appear to float on the product. A white block around the image looks amateurish and can ruin an otherwise great sublimation transfer.
Practical Advice
When you download, immediately rename the PNG file something like “Don’t Worry Be Happy – Transparent.png” so you do not confuse it with the JPG. Use the PNG whenever you place the design over a colored background. If you need to edit the PNG, do not save it as a JPG by accident unless you intentionally want a solid background.
Common Mistake #4: Forgetting to Check Color and Contrast
Y2k designs often use bright, saturated colors. The smiley face yellow, the bold text, and any gradients look great on a monitor. But sublimation printing can shift colors depending on your printer, ink, paper, and the material you press onto. Dark backgrounds, in particular, can mute or alter how the yellow appears.
New creators sometimes assume that what they see on screen will transfer perfectly. When the finished product looks dull or the yellow appears greenish, they blame the file. The problem is usually a mismatch between settings and materials.
What to Check Before You Press
Run a small test print on a scrap piece of material that matches your final product. Adjust your printer profile if needed. Pay attention to the contrast between the smiley face and the background. If you are pressing onto a dark polyester fabric, consider using a white backing layer or choosing a lighter area for placement. The file itself is well-designed, but your process determines the final result.
Common Mistake #5: Not Backing Up or Organizing the Files
You download the four files, use the PNG for a project, and then misplace the rest. Months later, you want to create a larger version or a variation, and you cannot find the AI or SVG. This scenario is frustrating and avoidable.
Creators who download multiple designs often end up with a cluttered folder structure. They waste time searching for the right file or, worse, end up using a lower-quality version because it was easier to find.
A Simple System
Create a master folder named “Don’t Worry Be Happy Y2k” and subfolders for each format or project type. Keep the AI and SVG in a “Source” folder, and the JPG and PNG in a ”Print-Ready” folder. This small habit prevents confusion and saves time every time you revisit the design.
What to Look for When Buying Similar Sublimation Files
Not every shop offers the same quality or file variety. Before you purchase, check these details:
- File formats offered – Do you get vector options? A transparent PNG? Multiple sizes?
- Resolution – 300 dpi at the stated size is standard for print. Anything less could look soft.
- License terms – Can you use the design for commercial products? Small businesses should confirm they have the right to sell items made with the file.
- Sample images – Look for close-ups that show the detail and color accuracy. A retro smiley should have clean edges and no visible pixelation.
When you download from a reliable shop, you get files that are ready to use without extra cleanup. The 18 x 18 inch size works for most standard sublimation blanks, and 300 dpi ensures professional results.
Making the Most of the Retro Smiley Trend
The Y2k revival is not fading anytime soon. Smiley faces, bold typography, and hopeful messages appeal to customers looking for positivity and nostalgia. If you are creating products to sell, consider offering variations: a black-and-white version, a smaller size for stickers, or a layout with different background shapes. Having the AI and SVG files makes these modifications straightforward.
For personal projects, this design works beautifully on home decor, gifts, or wardrobe staples. The transparent PNG lets you preview the design on different backgrounds before you commit to a print.
Final Thoughts Before You Press or Print
Downloading a sublimation file is only the first step. The value comes from using it well. Take a moment to understand each file format, check your print settings, and store everything in an organized way. Whether you are a seasoned professional or just starting out, the Y2k Don’t Worry Be Happy design gives you a fun, versatile graphic that will serve you across countless projects.
Thanks for visiting the shop. With the right approach, you can turn this retro smiley into something truly memorable.